


)
No products in the cart.
UMOJA LINN SUPPORT DOCUMENTATION
- 1. Vendor Registration
- 2. Stripe Connect
- 3. Shipping Policy and Settings
- 4. Adding Products
- 5. Notes of Importance
- Need Help?
Vendor Registration
Watch Tutorial video with step by step guide on how to register for your very own Umoja linn Marketplace store.
Stripe Connection
Watch Tutorial video with step by step guide on how to connect your Stripe account to your Umoja linn Marketplace store.
Shipping Policy and Settings
Watch Tutorial video with step by step guide on how to set your shipping cost, policy and setting for your Umoja linn Marketplace store.
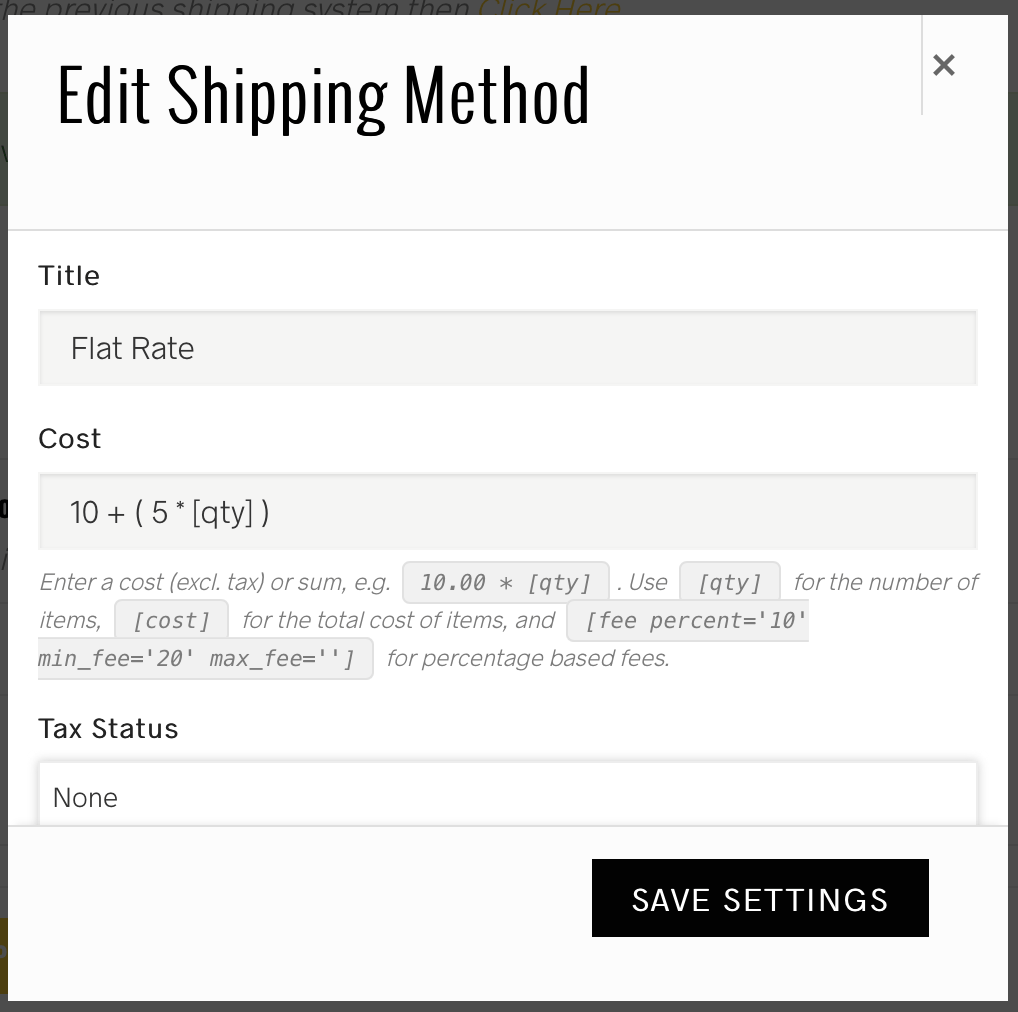
Shipping Setting Formula
See below for an example of the Shipping setting formula. In the below example the shipping has been set to charge 15€ minimum plus 5€ for every addition item add to cart.
Adding a Product
Creating products is super easy. After you have registered, you can easily create products and customise them from an intuitive dashboard.
To create a product, navigate to the vendor dashboard and then click on ‘Products’ from the left menu. After that, click on the ‘Add New Products’ button from the top right corner.

NOTE: The Maximum recommended upload file size is 1MB. Should your file exceed this limit, please compress your image prior to uploading to the site. you can use an online image compressor such as Optimizilla.
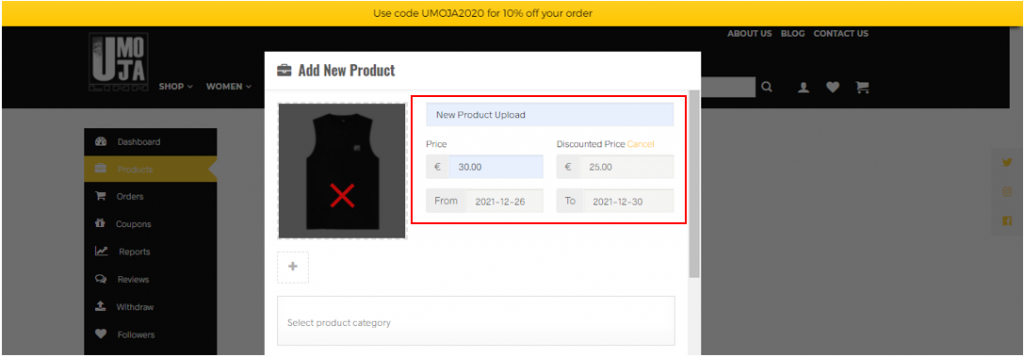
The common information about a product are the title, price, description. Discount price is optional. You can schedule discounts for a certain amount of time. You can enter a starting date and end date to apply automatic discounts to your product.
Tags and Categories
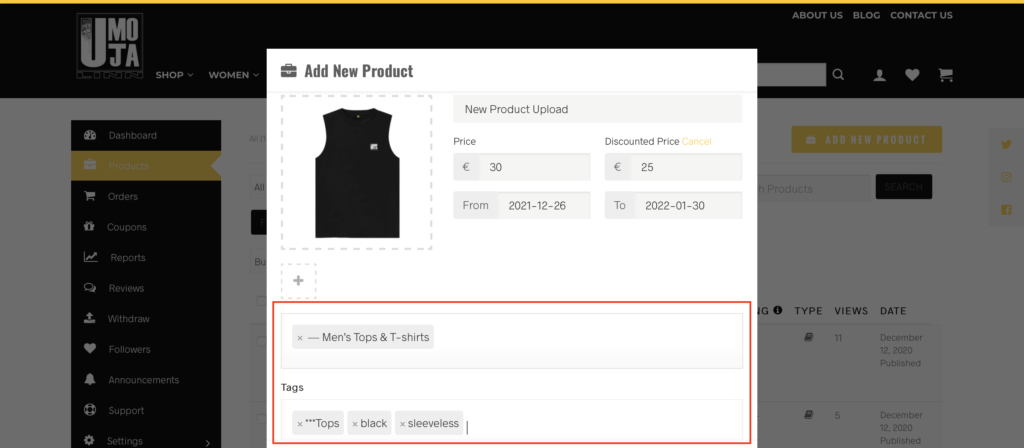
A list of tags and categories have been created by Umoja linn, select the tags and categories that apply for your products.
To add Tags and Categories, Select the Product Categories and Product Tags fields, select the appropriate product category and tags and Press Enter.
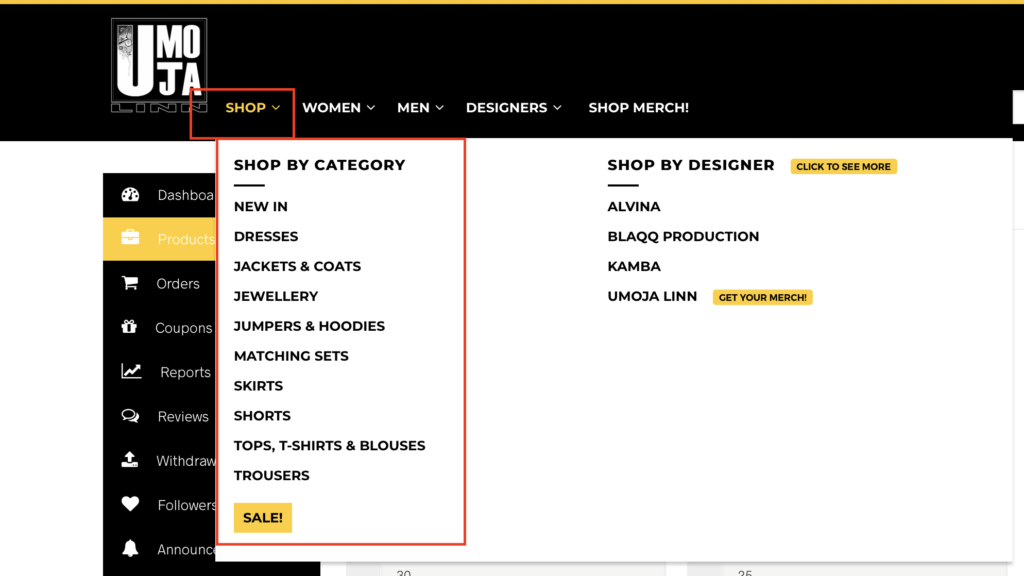
Ensure AT LEAST one starred “***” tag is selected. The tagged with the 3 stars prefix (for example, ***Tops, T-shirts & Blouses) are the tags which enable the product to be picked up and displayed under the selected category in the “SHOP” menu drop-down.
ENSURE that you add a size chart tag in other to add a size chart to your product.
If you are using the Umoja Linn size chart, add the tag “***Umoja Linn Size Chart”. If you wish to use your own size chart inform us via [email protected], and a tag will be created for you to use in other to add your size chart to your product.
Should you require a category that is not already listed, email us on [email protected] or via the direct chat by clicking on the Chat icon on the bottom right of this page.
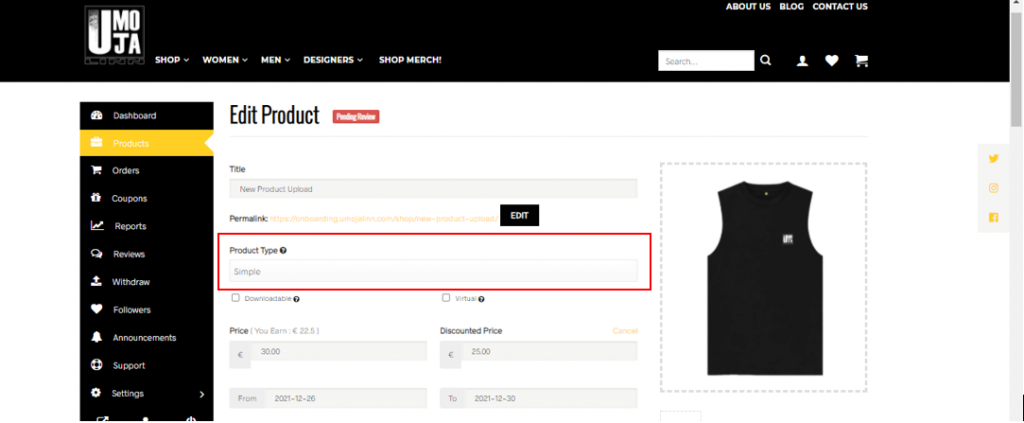
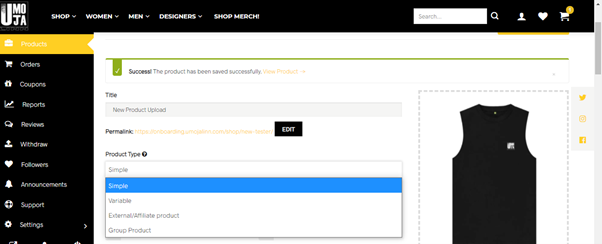
Selecting Product Type
Uploaded Products may be Simple or Variable Products.
Simple Product
These types of products are simple and have no variants. They are single and standalone products, which does not require any other information to define different variants.
Variable Product
A variable product is a product that has different types of variants. For example, you might want to sell a t-shirt which is available in 3 different colours and sizes. So this option will enable you to add those colours and sizes you need. You can add variations based on any attributes you’ve selected or created for the product, perhaps size, color etc. Before you can add a variation you need to add some variation attributes on the Attributes section.

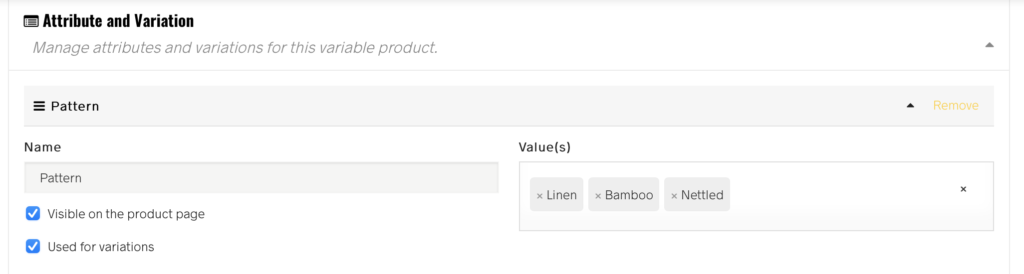
Attributes and Variables
Select any of the predefined attributes as shown below, click add attribute and select the appropriate value(s).
NOTE It is important to use the predefined attributes as appropriate to your store as this will ensure your products are captured by the overall Shop Filter. Should you require a variation that is not listed in the predefined attribute, email us on [email protected] or via the direct chat by clicking on the Chat icon on the bottom right of this page.

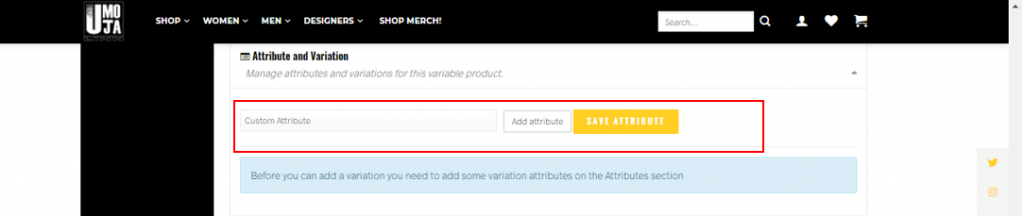
Creating your own Attributes
To create your own attributes, select “custom attribute” from the drop down list, click on add attribute and save attribute. You can customize your attribute and add the required values as appropriate.
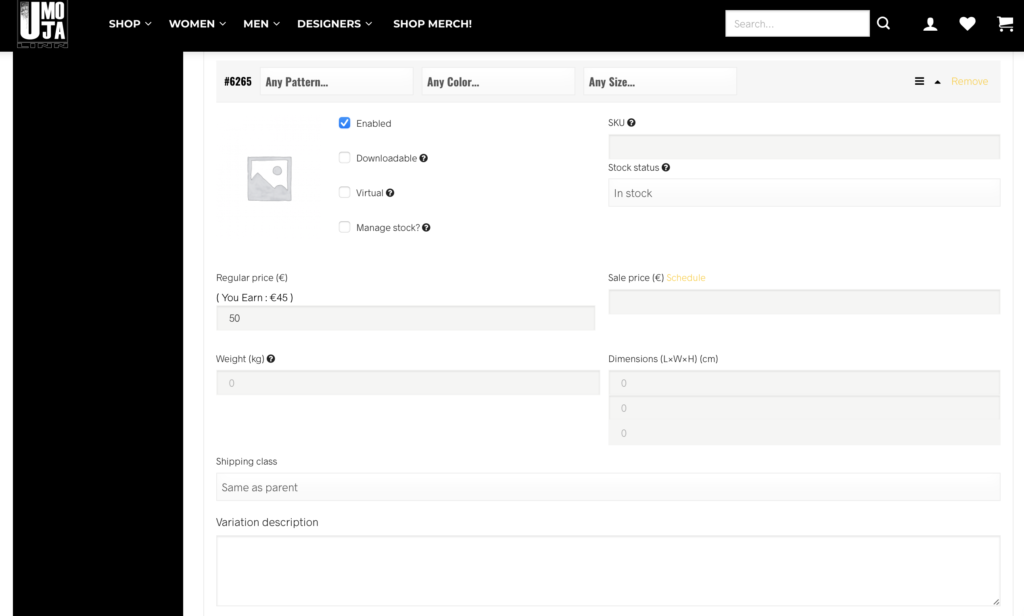
Creating Variations
To create variations, Click on ‘Go’ next to ‘Add variation’ and confirm the prompts. Possible variations will be created using the available attributes.

Expand Options to start editing the created variations. You can set a product image and even manage stock and pricing at variation level. At this stage you can set the price product and any sale schedule required. When you’ve filled out the appropriate fields, Click ‘Save Variations’ at the bottom of the page.
Inventory and Variants
None of the fields in this section are mandatory. If you do not need to add stock quantity and yours is just a simple product, then you can totally skip this section. However, if you are selling i.e. a dress or t-shirt, which has multiple sizes, then please read this section carefully.
What is SKU?
SKU stands for Stock Keeping Unit. It should be a unique set of characters which will not match to any other product.
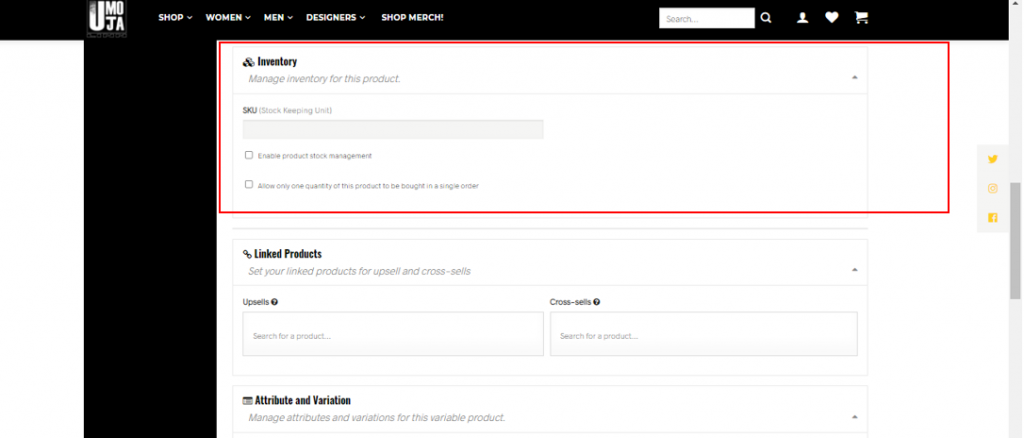
Enable Product Stock Management
Let’s say you have 10 pieces of the product and you don’t want to receive after orders are placed for 10 units. If you enable stock management and enter 10 in the quantity field, then after 10 units are ordered, this product will show a message that all the quantities are sold and there is no stock.
We DO NOT recommend Back Orders.
Size Guide
Umoja linn uses the Umoja linn Size Guide, however if a designer has their own specific size chart that they would like to use for their store, please contact us on [email protected] or via the direct chat by clicking on the Chat icon on the bottom right of this page.
ENSURE that you add a size chart tag in other to add a size chart to your product.
If you are using the Umoja Linn size chart, add the tag “***Umoja Linn Size Chart” to your product. If you wish to use your own size chart inform us and a tag will be created for you to use in other to add your size chart to your product.
Made to Order Products
Additional actions are required for ‘Made to Order’ items. They are as followed:
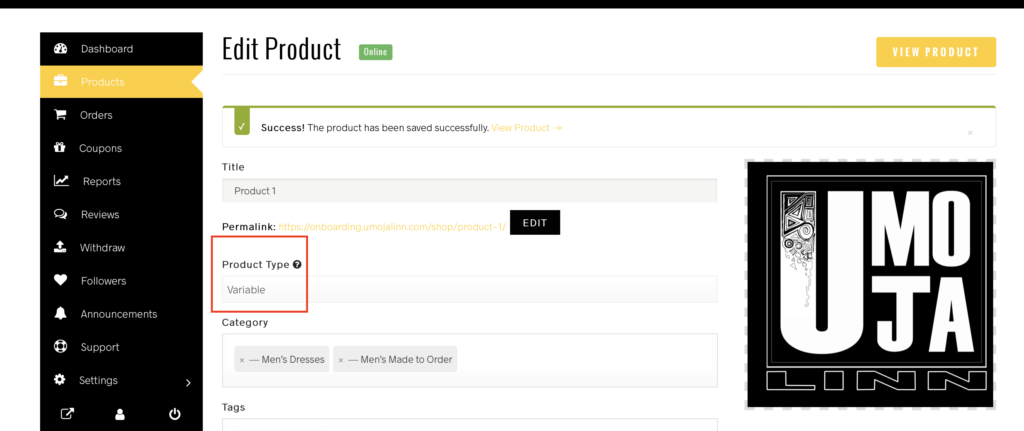
Selecting Product Type
Always select “Variable” product type for Made to order products
Categories and Tags
When Selecting categories For ‘Made to Order’ items, in addition to other selected categories and tags, make sure to select the ‘Men’s Made to Order’ or/and the ‘Women’s Made to Order’ category as appropriate and select the ‘Made to Order’ tag for all Made to Order products.. This enables the product to be picked up and displayed under the appropriate Category(s) on the site menu.

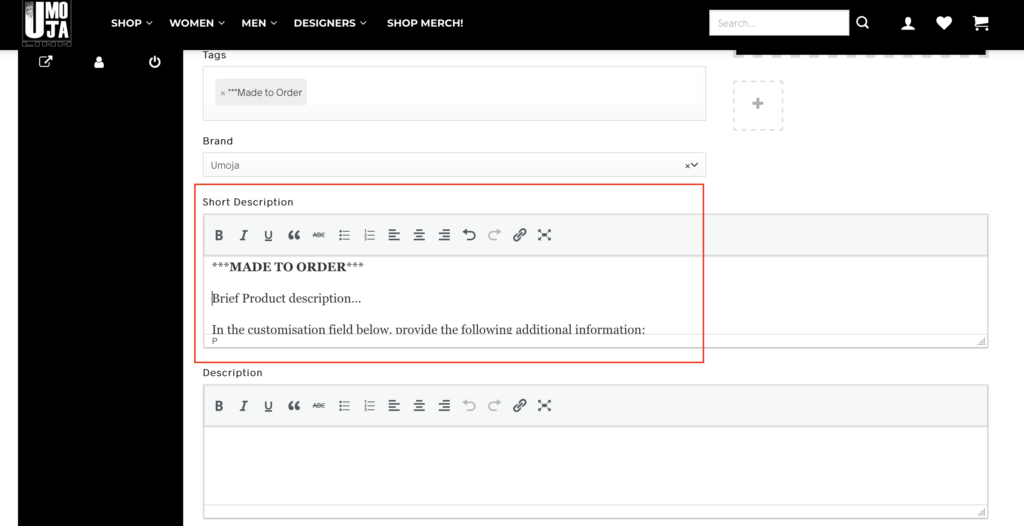
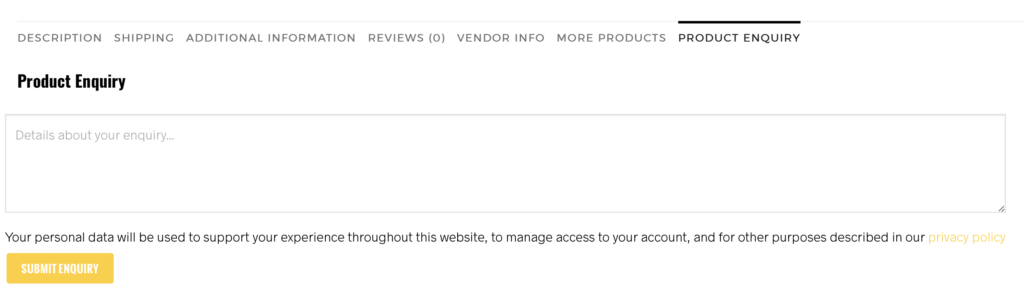
Product Short Description
In the ‘Short description’, all vendors are required to insert opening line: ‘MADE TO ORDER’ as shown below. The ‘Short description’ field must also include additional information (if any) the vendor requires from the customer regarding a specific ‘Made To Order’ item. The customer will provide any additional information required in the ‘Product enquiry’ field of the product page. This information will be sent directly to the vendor’s email as part of the order completion.
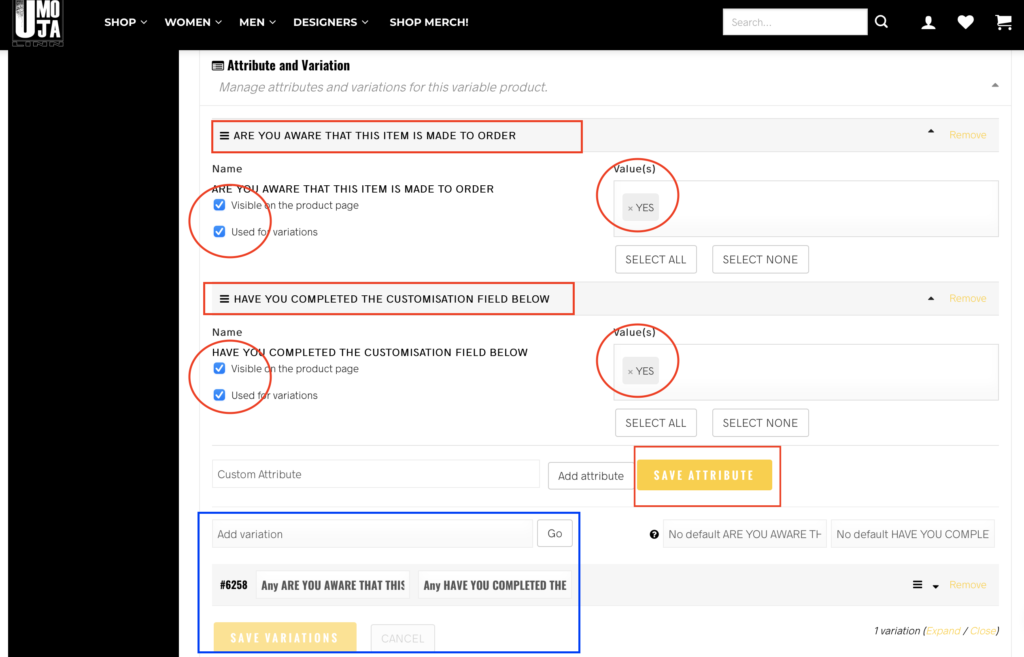
Attributes and Variation
Two attributes have been predefined specifically for ‘Made to Order’ items:
Attribute 1:
“ARE YOU AWARE THAT THIS ITEM IS MADE TO ORDER“
This attribute must always be added to ALL ‘Made to Order’ products.
Attribute 2:
“HAVE YOU COMPLETED THE CUSTOMIZATION FIELD BELOW“
ONLY add this Attribute when a designer requests additional information from a customer as detailed in the ‘Short Product Description’ Section above.
Select the attribute(s), ensure that both checkboxes are ticked for “visible on the product page” and “Used for variation”, add the “YES” value and click “SAVE ATTRIBUTE”.
Make sure to add the variation and save.
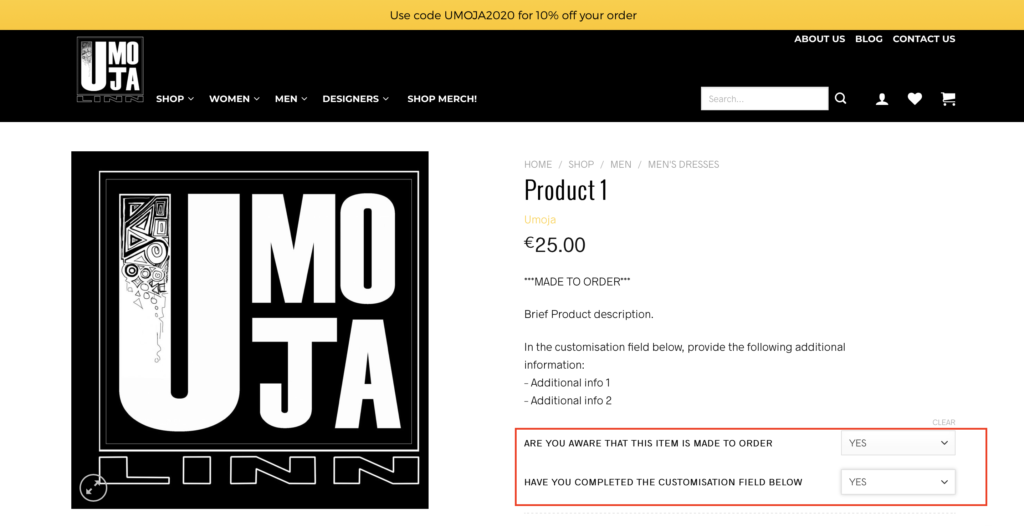
Once selected, these attributes will appear in the ‘Made to Order’ product page making sure the Buyer is aware that the product is a ‘Made to Order’ product and provides more information in the customisation field as requested by the designer.
The format of your ‘Made to Order’ product with additional information required as outlined in the short description should be as below:
Note of Importance
This section is a summary of all critical notes of importance from each of the tutorials listed in the Umoja linn Support Documentation: https://umojalinn.com/umoja-linn-support-document/
Please read this section carefully.
Before you proceed:
Ensure your vendor account is verified. Reference the ‘Vendor Registration’ tutorial Section 1 of the Umoja Linn Support Documentation: https://umojalinn.com/umoja-linn-support-document/
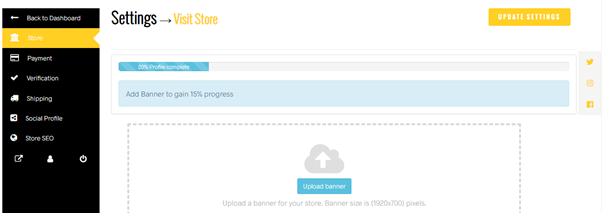
In Store Settings:
1) Use the recommended Banner size of 1920×700 pixels and do not change the image dimensions.
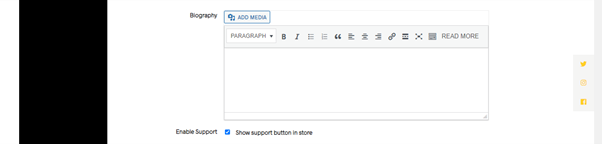
2) Ensure to outline your store shipping policy in your biography as listed in https://umojalinn.com/terms-conditions/
3) DO NOT deselect the Enable Support button below
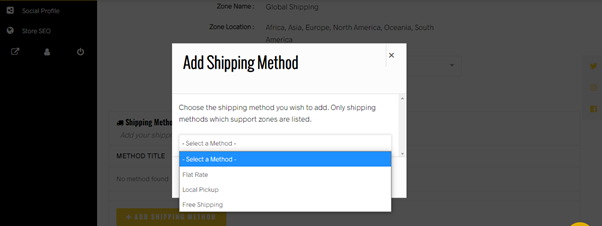
In Shipping Settings:
1) Only select ‘Flat Rate’, should you wish to select ‘Local Pickup’ or ‘Free Shipping’ please contact us on [email protected] to discuss. To set up your shipping please reference the ‘Shipping Policy and Settings tutorial’ Section 3 of the Umoja Linn Support Documentation: https://umojalinn.com/umoja-linn-support-documentation/
In the Products Section:
1) Product types may only be ‘Simple’ or ‘Variable’ products. Reference the ‘Adding Products’ tutorial 4: https://umojalinn.com/umoja-linn-support-document/ .
Contact Us. We would love to Help!
Please contact us with any query you might have, we are at your service.
You can contact us via email at [email protected] or via the direct chat by clicking on the Yellow Chat icon at the bottom right of this page.
Terms and conditions
1. Vendor Registration
Watch Tutorial video with step by step guide on how to register for your very own Umoja linn Marketplace store.
2. Stripe Connect
Watch Tutorial video with step by step guide on how to connect your Stripe account to your Umoja linn Marketplace store.
3. Shipping Policy and Settings
Watch Tutorial video with step by step guide on how to set your shipping cost, policy and setting for your Umoja linn Marketplace store.
Need Help?
Contact Us. We would love to Help!
Please contact us with any query you might have, we are at your service.
You can contact us via email at [email protected] or via the direct chat by clicking on the Yellow Chat icon at the bottom right of this page.